

Now that the weather has finally perked up, it's time to break out the picnic basket and start eating outdoors. This is a major deal for me since my kids seem to love to feed the floor half their meals. I'm sure most of the time it's accidental, but the floor is never that hungry and I'm the one who has to it clean up. Eating outside is very attractive to this mom. So instead of buying a bunch of throw-away stuff, how about some reusable gear? Much more eco-friendly and much more stylish.

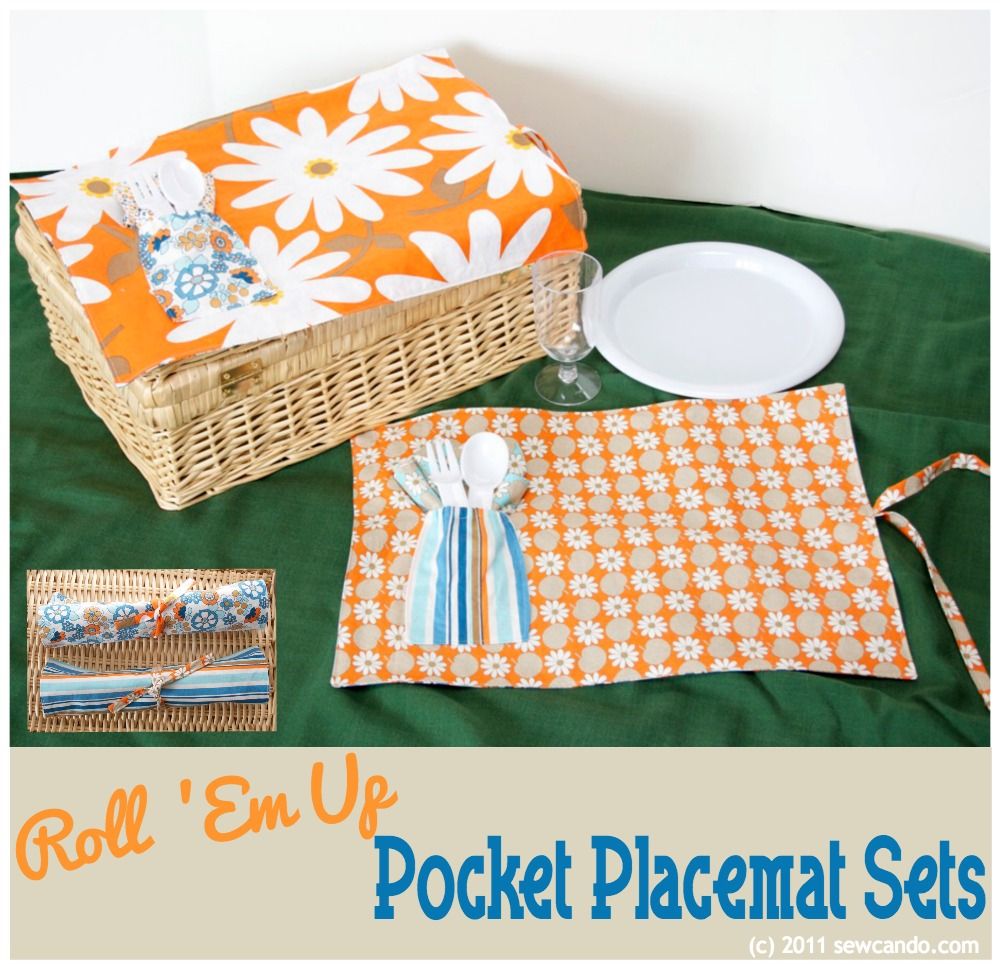
These placemats are reversible and have an elasticized pocket so you can tuck in utensils & a napkin and roll them up so everything stays put when you're on the go. Then just toss them and the napkin in the wash and all set for the next al fresco experience.

Here's how to get your own stylin' set going:
Step 1: Using 1/2yd cuts of various fabrics, cut 2 rectangular pieces for each placemat (you can decide how big you want them to be - mine were approx. 14"h x 20w")

Step 2: Then cut a rectangle for the pocket (mine was 7"h x 5"w). Fold over the top to make a 1/4"hem and then fold over again another 3/4" to make a casing and stitch it into place. Cut a strip of 1/4" wide elastic that is 2 inches smaller than the width (in this case 3") and feed it through the casing:

Step 3: Now turn under the remaining 3 sides and pin the pocket in place on the side of a placemat piece and stitch the sides & bottom:

Step 4: With right sides facing, place the other placemat piece on top and stitch together all the way around, but leave an opening several inches wide in the middle of one side for turning (and for adding the tie). Turn right side out.
Step 5: To make the tie, cut a strip 2"w x 14" l. Fold the long sides to meet in the center:

Fold again and then stitch along the edge. Fold over the short ends and refold again to hide the raw edges & stitch in place.

Step 6: Fold the tie in half and place the folded end into the opening of the placemat and top stitch all the way around:

To make a coordinating napkin, cut two 11"x11" squares of fabric and repeat Step 4, then turn right side out and top stitch the perimeter.

I used the really cute Organic Suzy Q fabric collection by Timeless Treasures to make mine. I loved how the colorful prints look together & have a retro feel.

Now if the picnic basket would just pack itself, we'll be all set for fabulous outdoor eating!

Sharing this creation with my FAVE LINK PARTIES too so click HERE to check them out!
Estival, coloré, ça donne vraiment envie d'aller pique-niquer.
ReplyDeleteBz
Anna
I love, love, love your blog.
ReplyDeleteMy name is Nina, I'm Portuguese and I'm beggining to learn how to sew.
I'll be following you since now.
You 'll be very wellcome at my blog.
See you latter.
Nina
This is such a great idea! I'm so glad you shared it. I've pinned it to my "Posts I Love" board on pintrest! http://pinterest.com/diyordont/posts-i-love/
ReplyDeleteKeep Crafting!
Sarah M.
www.diyordont.blogspot.com
so cute! I love them! I need to do this for our patio, too. Love it!
ReplyDelete~Terry
www.mossandclover.blogspot.com
So clever and useful! I love the fabric you chose, too.
ReplyDeleteOh, goodness, I LOVE it! Your whole blog is great. Newest follower, here!
ReplyDeleteWould love for you to link this at my summer long linky party!
"Life's a Picnic!" party!
Congrats! You've been featured!
ReplyDeletehttp://www.bigklittlea.com/2011/06/my-favorite-things.html
~K
How cute! I did something similar for my paintbrushes. I am having a blog hop party right now if you care to link up your blog!
ReplyDeleteHeather @ DIYduJour
Ahh! How adorable!! I love these! I have a picnic basket that could definitely use a set of these! Thanks so much for the inspiration and tutorial!! :-)
ReplyDeleteI've been wanting to make some of these. I love the fabric you chose. Thanks for linking to the party.
ReplyDeleteWell now if this is not all kinds of genius, I don't know what is!!!!!! This is so SMART! YOU are so smart! LOVE!
ReplyDeleteLove IT. I meant LOVE IT!
ReplyDeleteBeautiful placemats! Love the little pockets!
ReplyDeleteJust stopped by to let you know that I featured your pillowcase dress on facebook this morning - - an extra way to feature more favourites from my Round Tuit linky party!
Thanks again for linking up! Hope you have a great week!
Jill @ Creating my way to Success
http://www.jembellish.blogspot.com/
This is so awesome! Thank you for linking up to Sew Woodsy last week, and for being a loyal linker!
ReplyDelete