Friday, July 30, 2010

How To Make Die Cut Fabric Flowers

Today we have the fabulous Allie from Allie B Dallie here to show us a fun project using fabric & the Cuttlebug.  Allie has TONS of great cutting machine projects & since she has several different machines, there's something for everyone.  She's included a link in this post to her ultra helpful post on cutting fabric with the Cricut too.  Show us your stuff Allie!


I am so excited to be a guest here on Sew Can Do!!  I LOVE using die cut machines for all sorts of projects.  I own the Cricut Expression, Slice, and Cuttlebug.  I have cartridges and dies galore!  What I love about die cutting tools is that they are so easy to use and they make your crafts look FABULOUS!!  Here is super simple way to make 3D fabric flowers using the Cuttlebug and the Spellbinders Nestabilities Dahlia flower set.

What you need:

Cuttlebug
A,B & C plates
A piece of cardboard or 2 (I used one from a fruit snack box)
Fabric
Nestabilities or similar flower die sets
Scissors
Needle
Thread

Optional:
Button(s)
Fray Check
Fabric glue


Make your Cuttlebug "sandwich" in this order from the bottom up:
1)"A" plate
2) die with cutting ridges facing up
3) fabric
4) "B" plate
5) cardboard or something to add a little more pressure on the die.  This will make the image cut out more crisply
6) and finally your "C" plate


Cut the desired amount of images using the "sandwich recipe."  If your image wasn't completely cut out, carefully use scissors to cut the the pieces that tried to hang on. Use Fray check around the edges if you are concerned about fraying.  I happen to like the tattered look.  Layer the flowers from big to small.


Fold the layered flowers in half and sew right at the fold using an overhand stitch. 

 
Fold the flower in the opposite direction of the first row of stitches and sew the edge of the fold using the previous technique.   Notice I used a little clip to keep the layers in place.  These are very handy for this project. 

Keep the flower folded as it was in the last step and use an overhand stitch to sew around the FIRST row of stitches.  Make sure you are sewing through all of the layers.  This pinches the center together just a little bit more to give the flower a little more dimension.

                             
Open the flower up and you're done!!


Sew on a button if you like.  If making this for a child, secure the button with lots of stitches and use fabric glue for extra security.  Also, if I'm putting the flower on clothing, I also glue the flower on the garment and sew using a lot of stitches.  The last thing I want is for a kid to eat the button...or flower for that matter!! :)


These flowers are SO Cute on my daughter's shirt.  Notice I used two different fabrics on the other flower.
I hope this tutorial inspires you to make something beautiful!  FYI: you can do the same thing using the Cricut.  Just cut your images out using a 1/4 of an inch size difference for each layer.  To see my fabric cutting technique using the Cricut, check out my tutorial HERE


Thank you so much for checking out my guest post!  This was a lot of fun!!  For more inspiration,  please visit my blog at alliebdallie.com

Thank You!!
allie B

Thanks for sharing this Allie - I'm off to get going on some flowers of my own!


Thursday, July 29, 2010

Embossed Pop Can Card Tutorial

We've got another awesome guest for this week's CraftShare topic of Die Cut Crafts.  Alicia from Joy In The Everyday is showing us how to make this amazing card using pop cans!  She's a fellow homeschooling mom who shares their adventures and makes all kinds of pretty & fun things.  So while I rummage around in the recycling bin for mine, Alicia's going to get us started!


I am so excited to be guest posting today here on Cheryl’s blog Sew Can Do for CraftShare!! Just a quick few lines about me – my name is Alicia from Joy in the Everyday and I live in the northern suburbs of Atlanta with my husband and three kids, who we homeschool. When I am not teaching my three - or running them to their activities I enjoy baking, photography and paper crafting! I am always happy to share something new with my blog friends and today that is using soda cans in your die cutting machine. Let’s get started making this fun end of summer card.


Step 1 – You will need a soda can that has been completely washed and air dried. Using a good pair of heavy cutting scissors (I am using my Stampin Up rubber cutting scissors) cut a line from the opening of the can to the base.


Then cut around both the top and bottom – which will leave you with a can that looks like this.
Always be sure to use caution when cutting into and around the cans. Some crafters even wear gloves. I have never had any problems and I do not use gloves but, I am super cautious and take my time when cutting.
Step 2 – Now, decide what die you would like to use and run the can through your Big Shot or similar die cutting machine, just like you would a sheet of paper. I chose to use the Top Note Die made by Sizzix for Stampin Up.

Step 3 – To embellish my Top Note I decided to run the piece back through using a Sizzix Folder – which gave me this beautiful flower.

Step 4 – You could choose to leave the piece just as is but, I thought it would be fun to color in the roses using Alcohol Inks, perfect for use on metal!


Alcohol Inks are fast drying and will not rub off. Place a little alcohol ink on a plastic disposable plate and using cotton swabs dab color in the flowers. For a really random look you could just put drops of alcohol ink on your project and quickly rub in.
Step 5 – I also punched a scallop oval out of the remaining soda can and stamped a sentiment on it, using Stazon Ink.

Step 6 – Mount the piece on your cardstock using a heavy tape – such as red line or Sticky Strip from Stampin Up.


That is it. Now I also like to use various dies to punch shapes from the soda cans. Living in Atlanta we all love Coca Cola and I die cut this butterfly to hang in my daughter’s room. For that project I want the Coca Cola logo to show.

Hope y’all have fun with this technique! Thanks Cheryl for allowing me to guest post!


Thanks for teaching us how to make such a cool project Alicia!!

Wednesday, July 28, 2010

How To Make A Candy Bar Card

Today's special guest is Nancy from How To Homemaker. Her blog has lots of great ideas & tips that every homemaker should have in their arsenal.  She's got a great Cricut project for us that mixes my two favorite things - candy & crafting.  Take it away Nancy:

Good Morning Sew Can Do Readers!
I’m Nancy Jacobs from How To Homemaker. I’m a married stay at home mom of three busy teenagers. I enjoy blogging as well as teaching which is why How To Homemaker began. Over at my site I give tips almost daily on cooking, cleaning, gardening and anything related to homemaking. I even include some quick to fix delicious recipes and crafts.

Today I want to show you how to make a Candy Bar Card.
This card was designed to hold a snack size Kit Kat candy bar, but the size of it could be adjusted for any candy bar. I also used the Cricut machine to cut my paper for the card. I used the Storybook and Forever Young cartridges. Really though, a variety of cartridges could be used if you don’t have the ones I used on hand. You could use other die cutting machines as well or even hand cut something yourself! It’s really the technique that is important. (Take note: the basic shape of the card is a rectangle that fits around the candy bar, then there is just a layering of decorative embellishments plus a ribbon.)

Above I have shown all the parts to make the card. The base of the card is from Storybook cartridge, image Birthday Boy using Accent Blackout. I cut it at 5 ½”.
The piece that looks like half of the base card is a layer for the top of the card and again the same. Storybook cartridge, image Birthday Boy with Accent Blackout. This time it is cut though at 5 ¼”. This piece is also cut just ¼” off of center so basically in half.
The scallop circle is again from the Storybook cartridge. I used the Shift, Shadow, letter ‘I’ to make the scallop circle. It is cut at 2 ¼”.
I cut doll images from Forever Young cartridge at 4 ¼”.
I also have 18” ribbon.
Begin by scoring the base card at ¼” on each side of center.

Next it is time to start layering.

Lay the 18” of ribbon across the center of the card. Use a bit of adheasive to secure. Next layer the piece that looks like half of the base card.

Finish by layering with the scallop and the doll image adhearing all in place. Insert the Kit Kat candy bar and tie shut.
I think these are so fun for a young teenage girls’s party. My daughter likes watching the show America’s Next Top Model. Next time she has her friends over to watch it, these will be the treats I’ll be handing out!
Thanks everyone for letting me be here today and I hope you will pop over to How To Homemaker and say “Hello”!
Nancy

Thanks for sharing this fun & easy tutorial Nancy!!

Tuesday, July 27, 2010

CraftShare Week 9: Die Cutting Gift Bags


This week's CraftShare topic is a new favorite for me, Die Cut Crafts.  I'd always assumed cutting machines were just for scrapbooking, but there is so much more you can do with them - decor, frames, cards, signs, boxes, bags, invitations, school projects and the list goes on.  So I figured it would be worth it to get one.  When I was trying to figure out what to try the big question was what kind would be best?

Manual vs. Electronic Cutting Machines

When I finally decided to take the plunge into a machine I got a Cuttlebug manual cutter & a bunch of die cuts & embossers for it.  It's pretty reasonable in price and if you just want to do small scale stuff like cards & scrapbooking, it's ideal.  The downside is that you're limited in size to whatever the die sizes & shapes are.  It was a good starting point, but I wanted to expand a bit.

Since I do a lot of crafting, have a small business & we homeschool, I then upgraded to a Cricut Expression and LOVE it.  I was really psyched about all the size & design options it provided, but wasn't sure how I'd be able to avoid spending a small fortune on cartridges.  So after some online researching, my fabulous husband found the ideal solution: Sure Cuts A Lot.


This amazing software works with your Cricut machine so that you can cut out your own designs, use inexpensive svg files or free artwork/fonts online without having to shell out for a bunch of pricey cartridges you may not use very often. I couldn't believe it until I bought it myself & tried it out.  It was AWESOME.  The possibilities are just endless.

I've been using it for a while now and it really is as easy & fun as it sounds, so I've decided to become a Sure Cuts A Lot affiliate by adding a button to make it easy for my readers to head over & check it out for themselves.  Today's project was made using this software & my Cricut.  Here's the 411 on how:    

Making A Star Wars Gift Bag:

I made this bag to hold my nephew's birthday present.  He's really into Star Wars right now, so I wanted to make it fit the party theme without buying some overpriced wrap or gift bag.  I found the silhouette image of Darth Vader & the Star Wars font for free online and using the Sure Cuts A Lot software, I sized them for my bag and used some small cardstock scraps to cut them out on the Cricut:


To make the bag itself I bought this really cool set of gift box svg files from SVGcuts.com.  I used its gift bag files with Sure Cuts A Lot to make the bag pieces and then folded & taped them together with double sided tape.  It included the tags, so I didn't have to make an extra card to go with it. This was my first homemade gift bag and it was a success with the birthday boy.   I'm really looking forward to making some more of these with some pretty printed papers and more cute cutouts.


Custom gift bags that are fun to make + easy on the budget = BIG WIN!

Sharing this with my fave link parties too so check them out here!


Monday, July 26, 2010

Craftastic Monday & Final Week of CraftShare


Welcome to this week's edition of Craftastic Monday!  I can't believe it, but we're already into the last week of CraftShare.  I hope you've all enjoyed it as much as I have.  We've covered LOADS of topics and projects in just 2 months!  But stay tuned for this week's topic: Die Cut Crafts!   Interested in ideas for the Cricut, Sizzix, Cuttlebug or Silhouette?  Then this is the week for you!  If you missed any previous topics, don't worry, there's an entire page for all the CraftShare projects & tutorial links.  And remember that the CraftShare Flickr Pool is still open for you to show off any projects you've made in any of the topics we've covered.

Now let's check out some of the fun links from last week's party: 

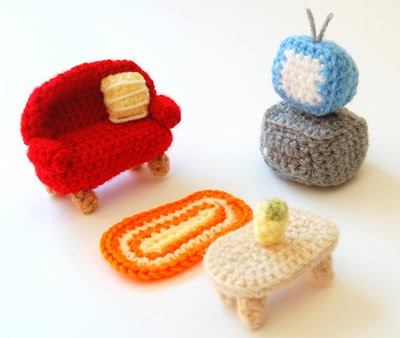
Beyond cute is how I describe this cute crocheted banana egg from Amieggs.  Seriously adorable!!


And I'm also loving her crocheted living room:


I've got parties on the brain with my little girl's 1st birthday coming, so this cute cowboy cake from Alison at Oopsey-Daisy really jumped out at me.  Check out her entire cowboy-themed party - she even did personalized "Wanted" posters!


And since last week's CraftShare topic was felt, I was thrilled to see this cute beehive pincushion made by Megan over at Fowl Single File that even has bee pins to go with it:


Now it's your turn to shine!  If you've created something fun (sewing, baking, decorating, papercraft or anything else crafty), link on up! The rules are simple:
  • As long as it's crafty and made by you it's Craftastic. Just add the link to your specific post (not the main page of your blog).
  • Include the name of your Craftastic creation, your blog name & a pic of your project.
  • Grab my party button & put it on your post or blog to share the party with everyone.
  • Check out some of the other great links and share some crafty comment love.
This party is for sharing your own fun craft ideas & homemade projects (not promoting products), so please no giveaways, linking up another party, Etsy shops or online stores.

I leave the party open until 12pm EST Thursday. As usual, at the end of the week I'll be featuring some of my favorite links, so please remember to add the Craftastic party button to your post or blog so I can consider featuring your project.

New Look Button
<a href="http://sewcando.blogspot.com"><img src="
http://i893.photobucket.com/albums/ac133/cerise422/sewcandoPARTYbuttonworking.jpg"/></a>


Friday, July 23, 2010

Felt Needle & Hook Book Tutorial


Today's gorgeous felt project is from the talented Michele of Michele Made Me.  She's fairly new to blogging, but has a real flair for turning ordinary materials into breathtaking crafts (you've got to check out her pincushion made from a toilet paper roll - it looks ultra stylish!).


We crafties all need stylish ways to keep our craft stuff organized, so here's a new project that also provides a solution, the Felt Needle & Hook Book.  So let's have Michele get this pretty tutorial started:

Hello there! My name is Michele. Today, as part of Craftshare, Cheryl has allowed me to take over the posting duties here at Sew Can Do! I'm kinda honoured, kinda thrilled and kinda scared all at the same time. It's my first time doing this and man, have I got some serious shoes to fill...

Shall we get to the shoe-filling then?... Wish me luck!

Today I am showing you how to make a 'Needle and Hook Book' to hold all of those sewing needles and crochet hooks. It is a colourful little project made of felt (cause it's Felt Week here at CraftShare, right?).

So, here's what you will need: yarn, felt in many colours, embroidery floss, fabric, scissors, a couple of sewing needles.


All that, plus your trusty sewing machine.

Now, my design process is kinda simple. I just take out several felt colours that I feel go well together and start working!  From these colours, I choose a main colour.
Here, I chose blue. From this blue I cut out a 10"x 10" square. That's my background.

From my other coloured scraps, I very uncarefully (no templates here) cut out a bunch of differently sized circular shapes. I cut out a BUNCH. If I have too many I save them for a later project.


I start to place my circles in some appealing way on my blue background, layering some of the circles, grouping them in complementary ways. Until I create a design that pleases me. In other words, I GO with it...  I BECOME the felt, so to speak.


Once I have a design that I like, I pin a section of it to the background.

The rest of the felt design, I remove from the background and carefully set aside somewhere safe so it doesn't get all messed up. Don't want to have to start re-designing all over again!

Working on this one section from the bottom layer up, I start embroidering the edges of my pieces with embroidery floss (your colour choice). Here I use the most basic blanket stitch for every edge. For each eye, I use a french knot.

I repeat this step for each section of the design, until the whole thing is embroidered onto the background.


Now I can embellish the whole piece with some couching. In this case the couching is done using yarn, and thread (to hold the yarn in place). You'll need a large sewing needle for the yarn and a smaller one for the thread.

I start the couching by making a knot in the end of my yarn and bringing the yarn up through the background as shown. I do the same with the needle and thread. The couching process is also very free-form. I design as I go, placing the yarn where I think it looks good and then sewing it in place with the thread.


I do as much or as little as I like. The design dictates how much couching is needed.


Once the couching is done, I cut out two rectangles of felt 4-1/2" wide x 10" high.
I place them on the reverse side of my background.


I machine-sew them in place with a 1/4" seam allowance.


Next, I cut two rectangles out of a matching fabric. One rectangle measures 9-1/2" x 19"; the other measures 9-1/2" x 5". Here I fold the larger rectangle in half right sides together, making a square.


As in the following pic, I machine sew a hem in the top of my small rectangle. I place the small rectangle between the two layers of the square. Then I pin the edges of the square and machine-sew (1/4" seam allowance) all around the edges leaving a 3" gap in the bottom edge.


I flip the whole thing inside out and press. Now it looks like this.


I close up the hole in the bottom with some hand stitching.


And machine-stitch down the centre of the square. I also make some smaller channels by stitching a few lines in one of the pockets as shown.


You see it better here...


Now I pin the fabric square onto the felt square, back sides together.


And I machine stitch down the centre to attach the fabric square to the felt square. It looks like this from the other side.


Do I like the look of all that machine stitching on the front? Naw, it looks bad! So I couch on top of the machine stitching all around the edges and down the centre line.


To make it look like this... Much better! Look at those little teddies swimming around! They are having so much fun!

Now, we're almost done, but not quite!


Finally, I make a fastener using a small piece of felt which has a 1-1/2 " slit in one side and is reinforced with blanket stitching. This piece is stitched to the back of the book and embellished with a circle. And a special "made-from-scratch Michele-Made-Me" covered button is used to finish the whole thing off!!!


Here is the end result!


And here is another one I made for a friend using pretty much the same process.


Now it's your turn! Have fun!

And Cheryl, thanks for having me. Let's do it again sometime! xx


Thanks so much Michele for this fabulous & useful tutorial!!

LinkWithin

Related Posts with Thumbnails