On Tuesday Ashlee from
TopsyTurvy taught us how to make a
Topsy Turvy cake. Now she's back to show us how to make these gorgeous, realistic roses for decorating it. Take it away Ashlee!
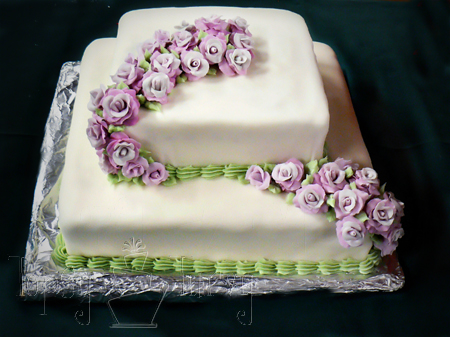
I'm Ashlee from Topsy Turvy again, this time to show you how to make Fondant Roses like on this cake here!
This is easier to show in person, or maybe I'll do a video soon, but for now this will be a long post, don't let it intimidate you. Once you get the hang of them it get's easier. When I'm making a ton of roses I like to watch a movie at night with my husband while I work on each stage.
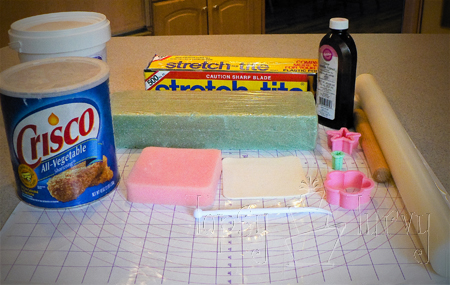 Before you start make sure you have the following:
- Fondant (
I prefer Satin Ice, but whatever you do stay away from Wilton. This is NOT the time to work with Marshmallow fondant either, it's great for covering a cake, but not working with this thin detailed work)
- Gumpaste
- Gel color of choice
- A plastic mat
- Shortening (
to rub the mat so the fondant won't stick)
- A rolling pin
- Flower fondant cutter set
- Ball tool
- Art brush
- Vanilla
- Toothpicks
- Thin and Thick Foam pads
Fondant is sufficient for making a rose, Gum-paste is great (
you can get it REALLY thin), but a fondant Gum-paste mix is my preference. Fondant alone is too thin, Gum-paste is sometimes more difficult to use. So a mix between the too is great. You can make them in one day, but it's easier to work with them if you do each stage at different times. The secret to making them look as realistic as you can is to get the petal layers as THIN as possible.
First you want to mix the gum-paste and fondant at a 1 to 1 or 2 to 1 ratio. It totally is up to you what you like working with best. If you don't want to buy a package of gumpaste you can also use Gum Tex. It's a powder and will last longer, although it's not quite as good as using gum-paste. But since Gum-paste dries out pretty fast you'll only want to go that way if you'll be using it before it gets dry. Don't forget to also mix in whatever color you want your roses to be.
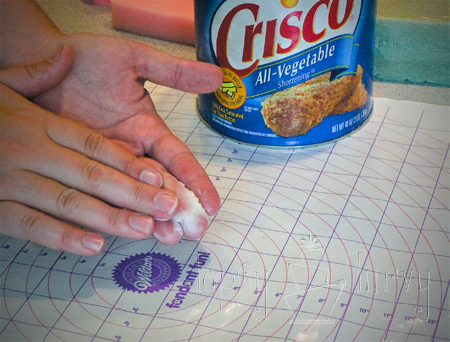
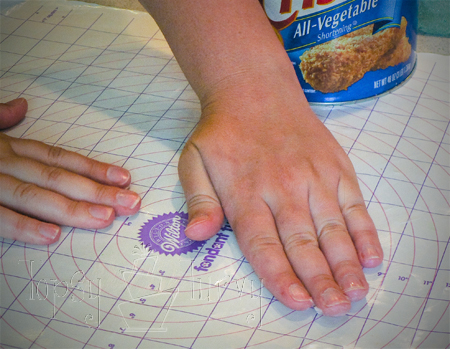
When working with Fondant and gum-paste you don't want it to stick to your hand, so you have two choices. Use lots of Crisco or dust everything with a cornstarch/powdered sugar mixture. I like using Crisco on my hands, mat and rolling pin, and the cornstarch/powdered sugar mixture on tools.
 CENTERS
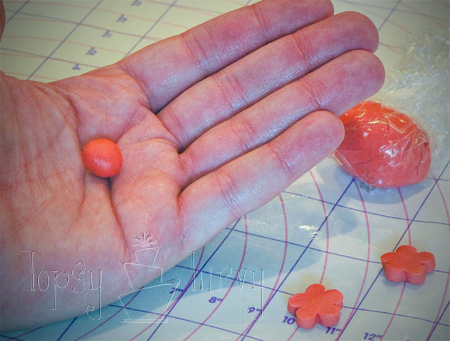
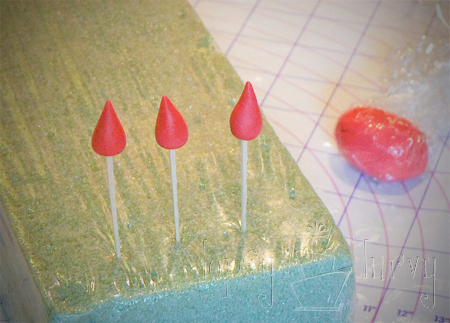
Step 1:
Roll the fondant to be a 1/4 inch thick. Using smallest flower cutter. Each cutout will be the amount used to create the fondant centers. If your making a larger rose use a larger cut out, we just want to make sure all the centers are the same size.
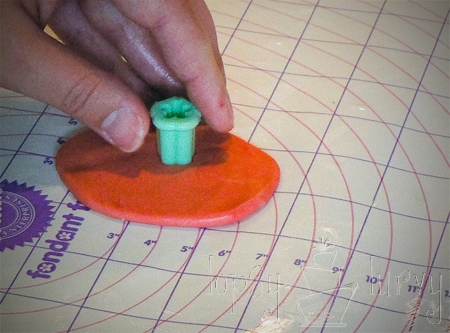
Step 2:
Roll fondant cutout into a ball.
Step 3:
roll it with fingertips to form a teardrop shape as show below:
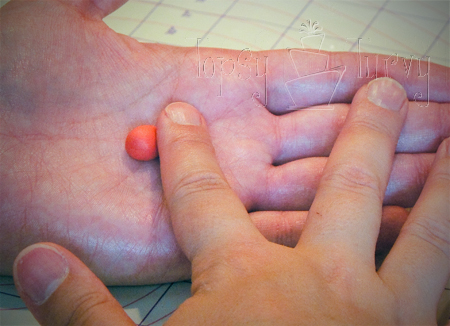
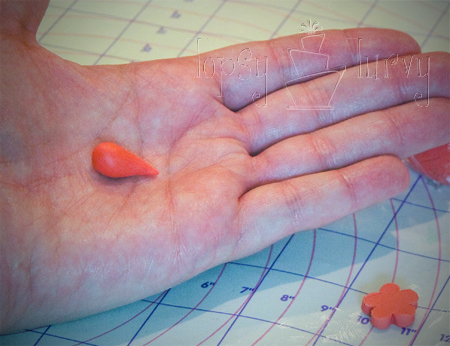
Step 4:
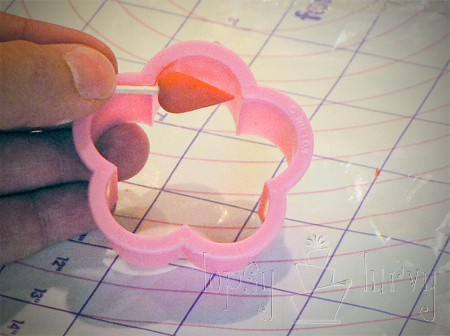
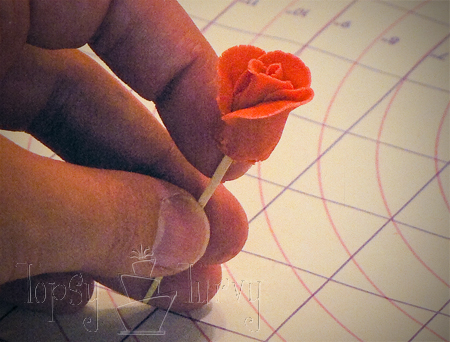
Put your tear drop shape onto a toothpick. Then make sure this cone center is as long as the width of one petal from large flower cutter. Again, if your making a larger rose with a larger cutter this rule still applies.
Now this is where I like to make ALL my centers at the same time. Then when I move onto the next stage it will be dry enough to handle without worrying about it getting destroyed. But you CAN move directly on to the next part, just be careful.
 PETALS -
 FIRST LAYER
Step 1:
Grease up your hands and mat...
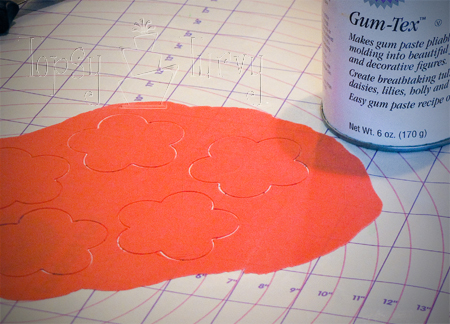
Step 2:
Roll the fondant from center to the edge to stretch into a very thin layer. I know it is thin enough when I cannot roll it any thinner and I can read the mat printed font through it. Then use your medium sized flower cutter and cut as many flowers as you can. Don't work with too much of the fondant at one time.
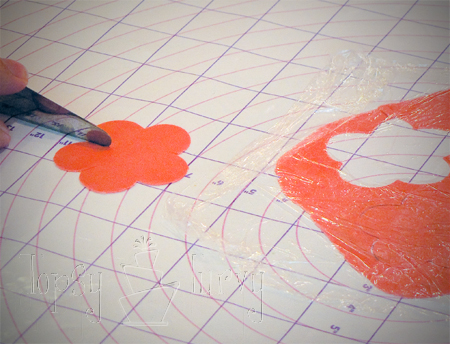
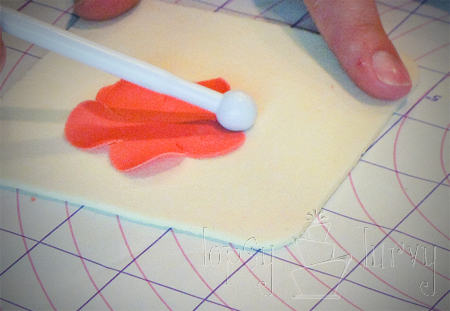
Step 3:
Take one cut out. Cover the rest with plastic wrap to prevent drying. Make short straight incisions in between each petal as shown on the picture below. This will make the more individual petals. (
The other option at this point is to completely cut the petals and put each petal on one at a time. But I find this way pretty easy.)
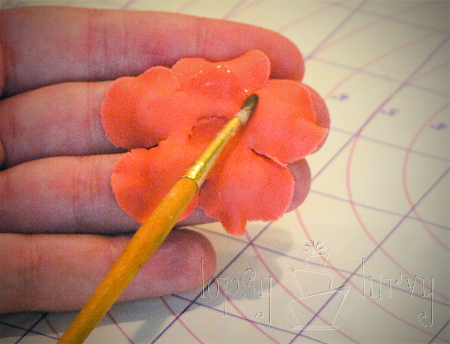
Step 4:
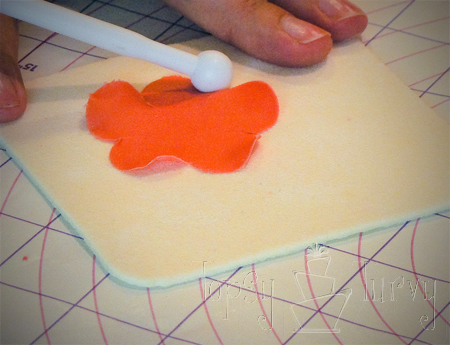
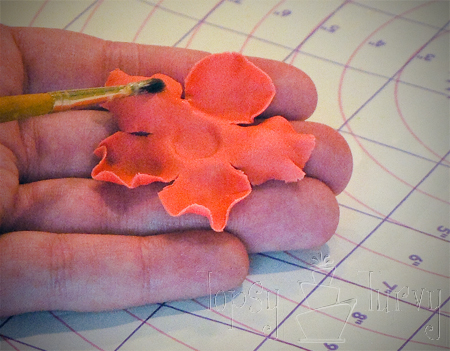
In order to create a more realistic effect, we have to thin the edges of each petal with the ball tool. Place the petal layer on the thin foam mat (
Note that I covered the foam with the cornstarch/powdered sugar mixture to prevent sticking.) Place the one side of the ball tool at its middle (
i.e., half of the ball is touching the fondant and the second half the thin mat). Roll your ball at the edge on each petal by pressing a softly. You will see the petals "rippling".
You don't want to over ruffle, so just softly and you can go over it. This is where the gumpaste part comes in handy. If it's just the fondant it tends to rip.
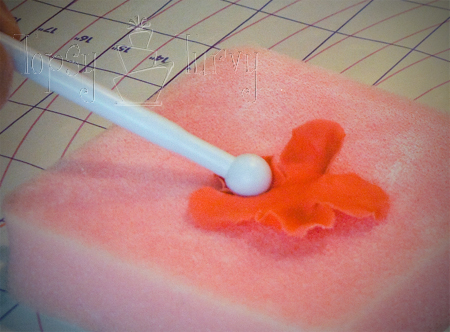
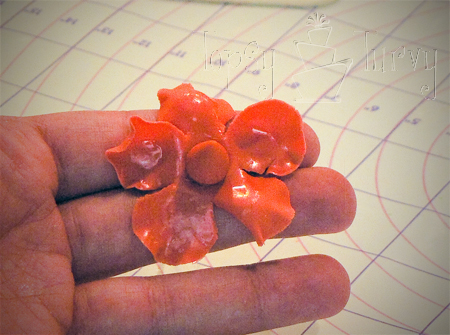
Step 5:
Place your thinned petal layer on top of the thick foam pad. Note that I covered the foam with the cornstarch/powdered sugar mixture to prevent sticking. With the ball, we're going to shape the first layer petals. Think of the 5 petals like a man, "head" (
top), "arms" (
sides) and "legs" (
bottom 2). Press the circle into the "head", "legs" and center. Flip it over and press the circle into the "arms".
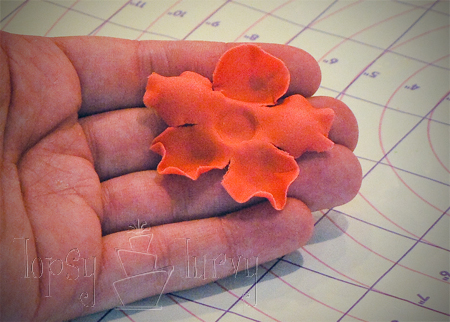
Step 6:
Now flip it back over into your hand and it will look like this:
Step 7:
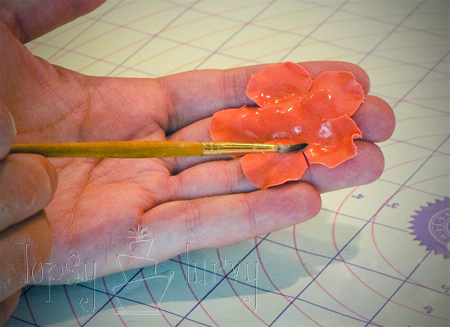
Apply vanilla to the inside half's of each petal, the center and one full "foot" petal.
Step 8:
Now place one of the tear drop shaped center into the center of the petal layer (
I keep the toothpick in the center and poke through the petal layer with it.)
Step 9:
Now take the "foot" petal that has the full vanilla on it and wrap it around the tear drop center. (
I flipped the petal layer around so my "foot" is on top).
It will look like this:
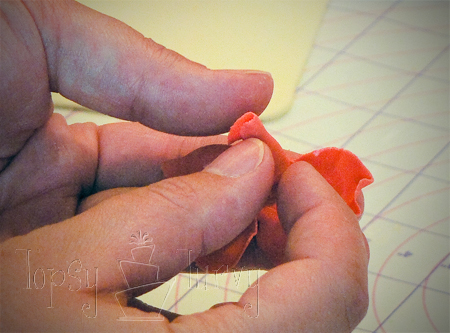
Step 10:
Now take the "head", and wrap it up, then the other "foot" around the center. Once I "glue" it in place I like to take my fingers and lightly pull back on the top edges of each petal to give it a more natural shape (
you know how real rose petals curl back a bit.)
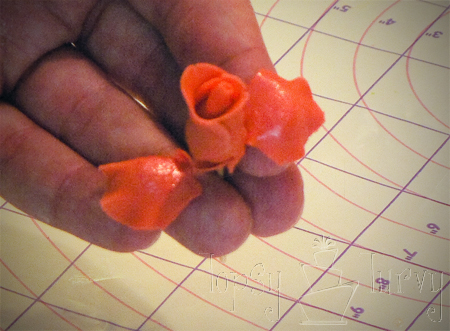
Step 11:
Now wrap around and "glue" the "arms" up. At this point I like to go through and do ALL the first layer on all the centers, so they can dry a bit and can be handled easier before moving onto the next layer. But of course you CAN just go straight on, just be careful because it's still soft.
 SECOND LAYER
Step 1:
Repeat steps 1-4 from the first layer. Then move it over to the thick foam and press the circle into the "arms" and center, then flip over to press into the "head" and "legs". So just opposite from the last layer and add the vanilla!
Step 2:
Put the finished first layer bud into the center of this petal layer.
Step 3:
"glue" the "arms" up around the bud now. (
you can see why I like the previous layer dry before moving on, holding a fresh layer like this would ruin it)
Step 4:
Now bring up and "glue" the "legs" and the "head". And remember to go back and curl the edges back just a bit. And you done with the second layer! Finish them all and let them dry OR... move on to the third layer!
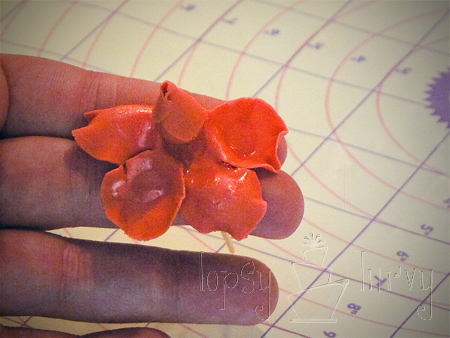
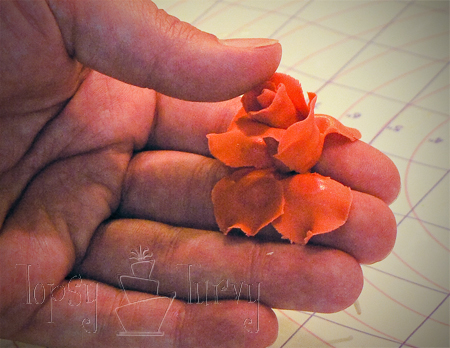
THIRD LAYER
Step 1:
Repeat steps 1-4 from the first layer. Then move it over to the thick foam and press the circle into the "arms", "head" and "legs", then flip it over and press the circle into the center. And add Vanilla to the center halves of the petals
Step 2:
Place the 2 layer buds into the center of this final layer!
Step 3:
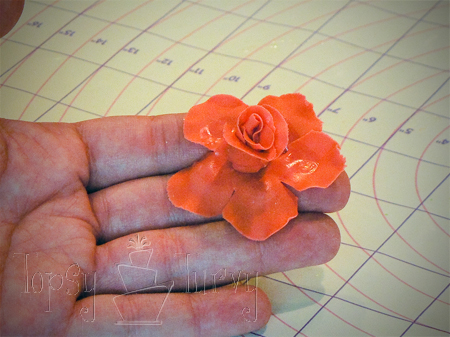
Now like drawing a star you'll bring up each of the 5 petal's one at a time "gluing" them on. Like this: "leg", "head", "leg", "arm" and "arm"... Once you have them glued on remember to curl back the edges of the petals to create a more realistic look!
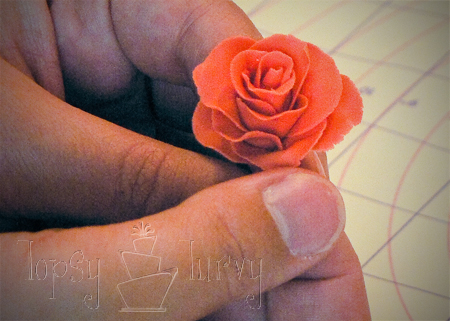
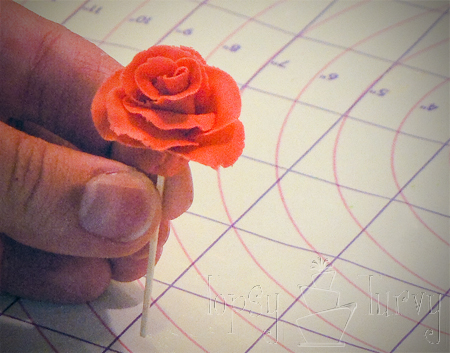
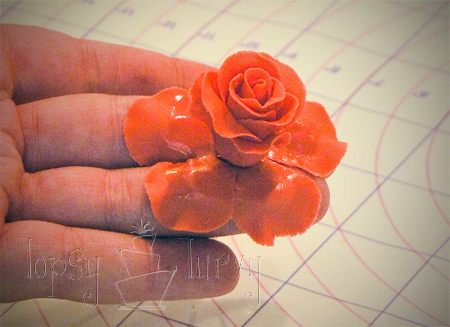
And there you go!

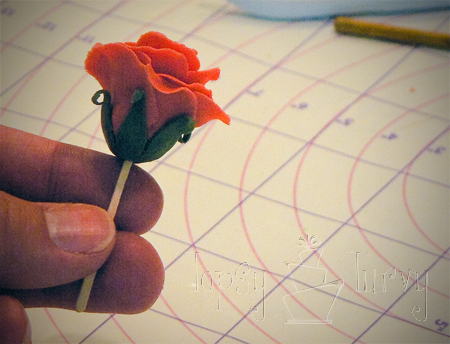
You can also add a Calyx if you want, but since my roses are usually in a cake I don't bother! It just depends on how much of the back of the rose you'll be seeing. If I stop at layer 1 or 2 for some buds I might add one.
Thanks again to Ashlee for sharing some gorgeous cake decorating secrets!